Composr Tutorial: Advanced Composr member system
Table of contents
- Composr Tutorial: Advanced Composr member system
Birthdays
Unless disabled, member birthdays will be shown in the main_bottom_bar block (shown at the bottom of the forum, by default).Additionally, members may choose to receive notifications for their friends birthdays, or the birthdays of all members.
If members have chosen to reveal their age, their age will show, otherwise not.
If members have not selected a date of birth, no birthday can show for them.
Conversr contains a feature to automatically create/link-to a shared birthday topic for a member. By default, this is linked both from main_bottom_bar and the notifications.
The notifications are sent using these language strings, defined in the cns language file:
Code (INI)
BIRTHDAY_NOTIFICATION_MAIL=It's {{{2}}}'s birthday. Come congratulate them on {1}:\n{4}
- Your site name
- The username of the member whose birthday it is
- A URL to the member profile (not used by default)
- The URL to create/view the shared birthday topic for the member
- A member ID
- Base URL
Choosing usergroups when members join
Usergroups have two settings affecting default usergroup memberships for new members:- Initial primary usergroup
- Automatic secondary usergroup
If there are 0 usergroups with "Initial primary usergroup", then the hard-coded default usergroup will be entered into for any new member. By default this is the one named 'Newbie' (i.e. the beginning of the rank ladder).
If there is 1 usergroup with "Initial primary usergroup", then this is the default usergroup for new members.
If there are multiple usergroups with "Initial primary usergroup", then the member is given a choice while joining.
Members are automatically put in any usergroup with "Automatic secondary usergroup" enabled, behind-the-scenes.
At the time of writing there is no way to integrate payment directly to the join process. Usergroup subscriptions are entered into after joining.
There is also a usergroup setting, "Open membership", that defines whether members may join a usergroup immediately, i.e. without needing approval from the usergroup leader. This is something members can do after joining, while browsing through the usergroup directory.
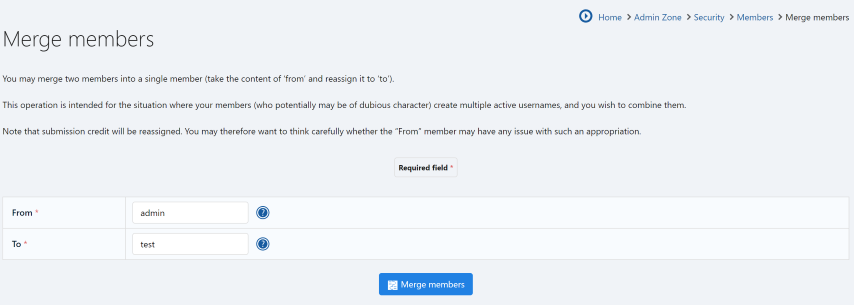
Merging members
Merging members
(Click to enlarge)
It is worth noting, that you should not be overly suspicious, as members who share some of the listed characteristics, may simply be family members in a household that shares an Internet connection.
The merge member feature will attempt to reassign everything attached (in any way) to the 'from' member to the 'to' member.
It is possible that some reassignments will not be possible, in which case, records may be dropped; for example, if both members share a secondary usergroup, Composr would fail [due to database key constraints] to assign both membership records to the same user, and hence drop one of them. You do not need to worry as this is handled automatically.
Custom Profile Fields
Custom Profile Fields are edited by editing member profiles. Side note: If you (as staff) edit the profile of another member then none of the CPFs will be set as required regardless of how they are configured, as the assumption is that you should not have to fill in unknown fields of a member that you are editing.
(Click to enlarge)
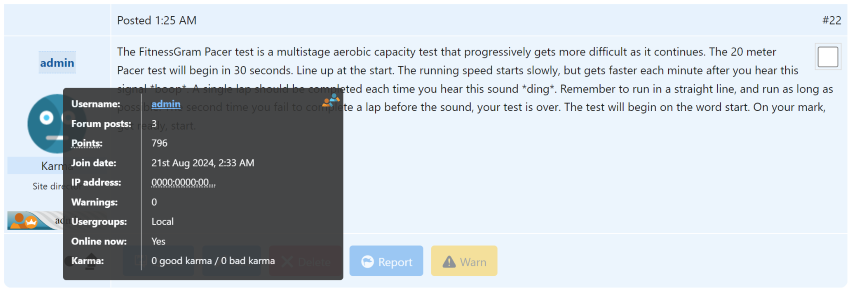
Custom Profile Fields are optionally shown where members post
(Click to enlarge)
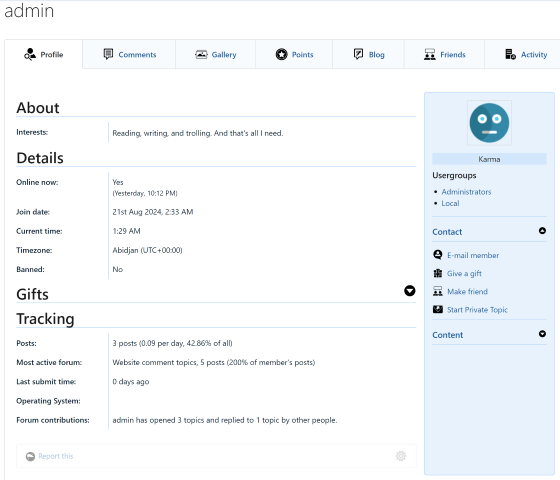
Custom Profile Fields are all shown in member profiles (those that the viewer has permission to view)
(Click to enlarge)
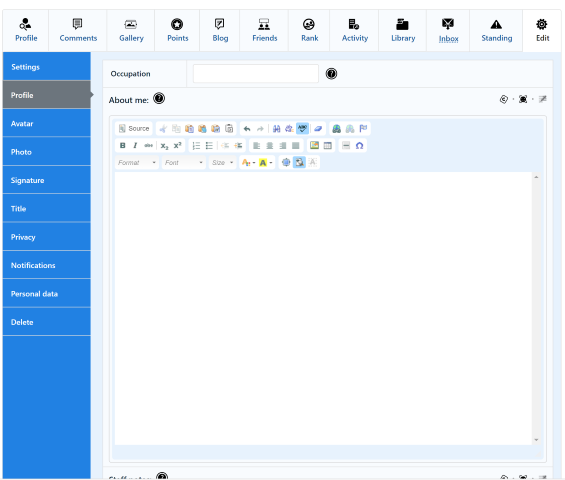
Adding a Custom Profile Field
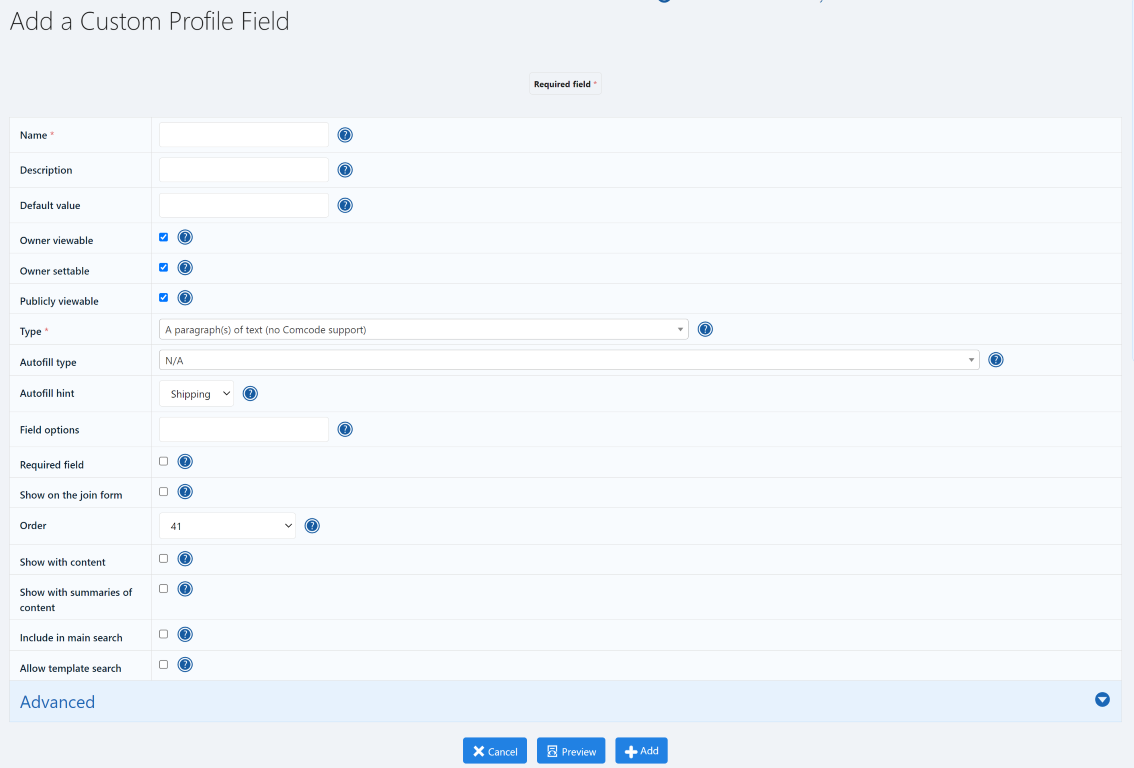
(Click to enlarge)
You can manage Custom Profile Fields from: Admin Zone > Setup > Custom Profile Fields.
You can delete a Custom Profile Field from the bottom of its edit form.
There are a number of Custom Profile Field options that you may set that allow CPFs to function for a number of different purposes, including:
- Storing hidden details on member (for example, a list of rule infractions, such as to aid decisions on cumulative punishment [although normally you would just use the warnings system for this])
- Allowing members to specify details about themselves (for example, their occupation)
- Forcing members to specify certain additional details (for example, on a forum for staff of a company, you could make members enter their job role, so as to reduce the chance of a non-employee from joining and remaining an active member)
- Allowing members of a certain sub-communities (via their usergroup) to specify details appropriate to that sub-community (for example, those in the 'Football' usergroup of a school discussion forum could specify the position they play, while those in the 'Music' usergroup could specify the instrument they play).
For details about the actual field types you can use, see the Custom fields tutorial.
There is a large selection of predefined fields for you to select, most of which have icons. These for example cover the most popular Instant Messaging systems, Social Networks.
Limitations (don't go nuts!)
If you have more than 60 textual CPFs (except Comcode ones), any ones created after the 60th will not be included for searching on the search module's member search form. This is due to a limitation in MySQL.Additionally, you could run into problems with large numbers of CPFs on some servers. Some servers limit the number of request variables, either using a PHP setting, the unofficial Suhosin addon, or through other means that may not even be visible. If you notice field values disappearing, or WYSIWYG-edited fields showing in raw HTML after editing, it is likely caused by a server limitation.
Display rules
It is possible to configure where a value for a Custom Profile Field for members will be displayed. The field will always be visible from their profile screen, but also:- if 'show in posts' is selected, it will also be visible on their forum posts, and their member galleries and member gallery images/videos
- if 'show in post previews' is selected, it will also be visible when displaying a member sub-gallery in a list of sub-galleries
In more detail:
| PROFILE FIELD SETTINGS | SHOWS IN FOLLOWING CIRCUMSTANCES | ||||||||||||
|---|---|---|---|---|---|---|---|---|---|---|---|---|---|
| Owner viewable | Owner settable | Publicly viewable | Required | Join | Admin add member | Edit own profile | Edit others profile | Edit others profile but has 'View any field' permission | View own profile | View others profile | View own or others profile but has 'View any field' permission | Member searchable | |
N | N | N | N | N | Y | N | N | Y | N | N | Y | N | |
N | N | N | Y | Y | Y | N | N | Y | N | N | Y | N | |
N | N | Y | N | N | Y | N | Y | Y | N | Y | Y | N | |
N | N | Y | Y | Y | Y | N | Y | Y | N | Y | Y | N | |
N | Y | N | N | N | Y | N | N | Y | N | N | Y | N | |
N | Y | N | Y | Y | Y | N | N | Y | N | N | Y | N | |
N | Y | Y | N | N | Y | N | Y | Y | N | Y | Y | N | |
N | Y | Y | Y | Y | Y | N | Y | Y | N | Y | Y | N | |
Y | N | N | N | N | Y | N | N | Y | Y | N | Y | N | |
Y | N | N | Y | Y | Y | N | N | Y | Y | N | Y | N | |
Y | N | Y | N | N | Y | N | Y | Y | Y | Y | Y | N | |
Y | N | Y | Y | Y | Y | N | Y | Y | Y | Y | Y | N | |
Y | Y | N | N | N | Y | Y | N | Y | Y | N | Y | Y | |
Y | Y | N | Y | Y | Y | Y | N | Y | Y | N | Y | Y | |
Y | Y | Y | N | N | Y | Y | Y | Y | Y | Y | Y | Y | |
Y | Y | Y | Y | Y | Y | Y | Y | Y | Y | Y | Y | Y | |
There is also 'Privacy' sub-tab in the account settings that allows members to limit access beyond this. Members may choose to display fields:
- Not at all
- To members
- To friends
- To certain usergroups
- To everyone
(Side-note: If there are more than 15 CPFs their privacy settings will only give them options for the CPFs they have filled in.)
Categorisation of CPFs
If you prefix CPF names like "Example: Field A" and "Example: Field B", Composr will be smart enough to treat this as a categorisation and display the join/edit-profile forms in a more appropriate way.Special CPFs
Composr may install a number of special CPFs used for keeping hold of standardised user data. Composr's core set of profile settings is intentionally kept very narrow, and the special CPFs extend it, even for some core data. This both keeps our system lightweight, and also serves as a mechanism for us to store core data in third party forums (for non-Conversr users).To avoid user-interface-bloat, we automatically disable some of the special fields, if they are not currently in use. Disabled fields will show when browsing CPFs, but they'll have no edit link. Typically this is when no addon needing them is installed. In some cases there are then config options to force them to be enabled. For example, the First/Last-name fields are only enabled if the shopping_cart addon is installed or if the "Enable first/last name fields" option is ticked (checked).
Special CPFs include:
- CPFs for tracking different sources of points (for example, how many ratings the member has made)
- CPFs for holding address details (used by the shopping addon, passed through to PayPal, for example)
- CPFs for holding payment details (if local payment is enabled, which is not a default-supported option by any bundled payment gateway, and should only be developed by programmers with a strong understanding of security and who will customise payment flow code as required)
- CPFs for storing a list of what sites a member of staff is staff on (used if a multi-site-network has been configured)
All these CPFs may be edited just like any other CPF – as long as they are currently active (see above). One exception is the CPF title, which has to be edited via language string editing rather than on the CPF editing form.
By default, and in most cases, the values of the CPFs are not publicly viewable.
Why some CPFs are locked
Some CPFs are only activated by certain addons. They are preinstalled as they may be shared between addons, yet may not be used by any. They show so you can know they are there, but are no made available for use to reduce feature-bloat. If no addons currently use them, they show in the list as unused and inaccessible. If you want them, you can install an addon that uses them, or simply add your own alternative CPF. The ecommerce addon uses quite a few.Encrypted CPFs (maintenance status) (advanced)
If you have the OpenSSL PHP extension installed and configured, Composr can automatically encrypt the contents of select CPFs, such that their sensitive data would not be revealed if the server were to be compromised. When adding/editing a textual Custom Profile Field, it is possible to mark it as encrypted inside the database.Encryption operates with a site-wide passphrase, i.e. only staff with access to the passphrase can view the data, not even the members who entered it.
Note that encrypted CPFs are only supported for text-based fields. Encrypted fields should probably not be set as publicly viewable, as the public would not be able to view the contents of the field anyway (not having the passphrase).
Configuring the functionality
A public/private key pair must be generated for the site, and uploaded to the server.To generate the public/private key pair, you will need access to a computer running OpenSSL; either a local one, or your server via SSH. At a shell, execute the following commands to generate the public/private key pair:
Code (Bash)
openssl rsa -in private.pem -out public.pem -outform PEM -pubout
The first command will generate a private key with a passphrase supplied when openssl requests it. The passphrase must be long, secure, and kept private, as it's the only way to access the private key (and thus the encrypted data). The second command will generate a public key from the private key, and will require the same passphrase to be entered again.
Once the key pair has been generated, they should be uploaded to your server, somewhere where they cannot be accessed from the Internet (so not in your htdocs directory). They should have their permissions set such that they can be read by your web server process, but nobody else.
The final step is to configure Composr to use the key pair to encrypt data. Set the "Encryption key" configuration option (Admin Zone > Setup > Configuration > Privacy / legal compliance options > Advanced) to be the path and filename of the public key file (public.pem), and the "Decryption key" configuration option to be the path and filename of the private key file (private.pem). If these options are not visible, it's because your server does not have the OpenSSL PHP extension installed or configured correctly.
Using the functionality
To mark a CPF as encrypted, tick (check) the "Encryption" checkbox when creating the field, making sure to first have encryption set up on your server and on Composr (otherwise you will not see the setting).Members fill in data normally on their profiles and encryption happens automatically under-the-hood.
When viewing an encrypted CPF on a member's profile screen, the encrypted data will not be decrypted or shown (the server literally does not know how). To decrypt and view the data, click the "Decrypt" link for the CPF. An overlay will allow the decryption passphrase to be entered and the data decrypted. The decryption passphrase is the passphrase used to unlock the private key, as specified when originally generating the public/private key pair. Typically only staff will have knowledge of the passphrase, since there's only one for the entire site.
When editing the value of an encrypted CPF, the encrypted data will be shown. To change the value, simply overwrite it with the data you want to change it to. Leaving the value alone will not cause it to be doubly-encrypted so don't worry.
Changing the settings on an existing field
The "Encryption" checkbox only affects new data entered into a field. If you are subsequently removing Encryption from a field existing data will remain encrypted and remain encryptable. If you subsequently add Encryption to a field existing data will remain unencrypted.The cpf_decrypt / cpf_encrypt Commandr commands allow you to bulk-change the encryption status of existing data.
Statistics
You can find a break-down of how CPFs were filled in from:Admin Zone > Audit > Custom Profile Field statistics
Required fields
The following fields usually need filling in:- E-mail address
- Date of birth
- Any Custom Profile Field set to required
However, there are a selection of privileges to soften this a bit. There are 3 common scenarios that show why we might want to soften the requirements:
- A staff-member adding an account on someone else's behalf, and not knowing the full details
- (Similar to the above) Members were mass-imported but with partial details, and you don't want staff doing editing of those accounts to have to fill things in
- A field was enabled or set to required after members joined, and you don't want to force them to fill it in next time they go to edit their account for some other purpose (potentially annoying!)
The privileges are:
- Bypass filling-in required Custom Profile Fields
- Bypass filling-in required Custom Profile Fields on existing accounts
- Bypass filling-in e-mail address account options
- Bypass filling-in e-mail address account options on existing accounts
- Bypass filling-in date of birth account options
- Bypass filling-in date of birth account options on existing accounts
Note that there are effectively two sets of privileges:
- Wholesale bypass of requirement (e.g. Bypass filling-in required Custom Profile Fields)
- Bypass of requirement on existing accounts (e.g. Bypass filling-in required Custom Profile Fields on existing accounts)
The wholesale bypass would typically be granted to staff and mainly exists for scenario 1. If lets staff add new accounts without having to fill everything in that would usually be required. It also is useful to generally remove the required-field status for date of birth and/or e-mail address fields (CPFs have individual required statuses so it is less useful for those).
The privilege on existing accounts is a weaker privilege that cover scenarios 2 and 3 well. They mean that if someone is editing an account (their own or someone else's) and the field is currently blank, they don't have to fill it in. However, if the field is already filled in then they will not be allowed to blank it out.
Note that there is an option "Take date of births". If that is disabled then date of birth fields will be completely disabled, and hence the above date of birth privileges won't have any effect. We allow date of birth to be either enabled or disabled because on some sites it would not be an appropriate thing to ask about. If date of birth is enabled but not required then the field will be titled as "Birthday" to indicate the lowered formality.
Welcome E-mails
Creating a welcome e-mail
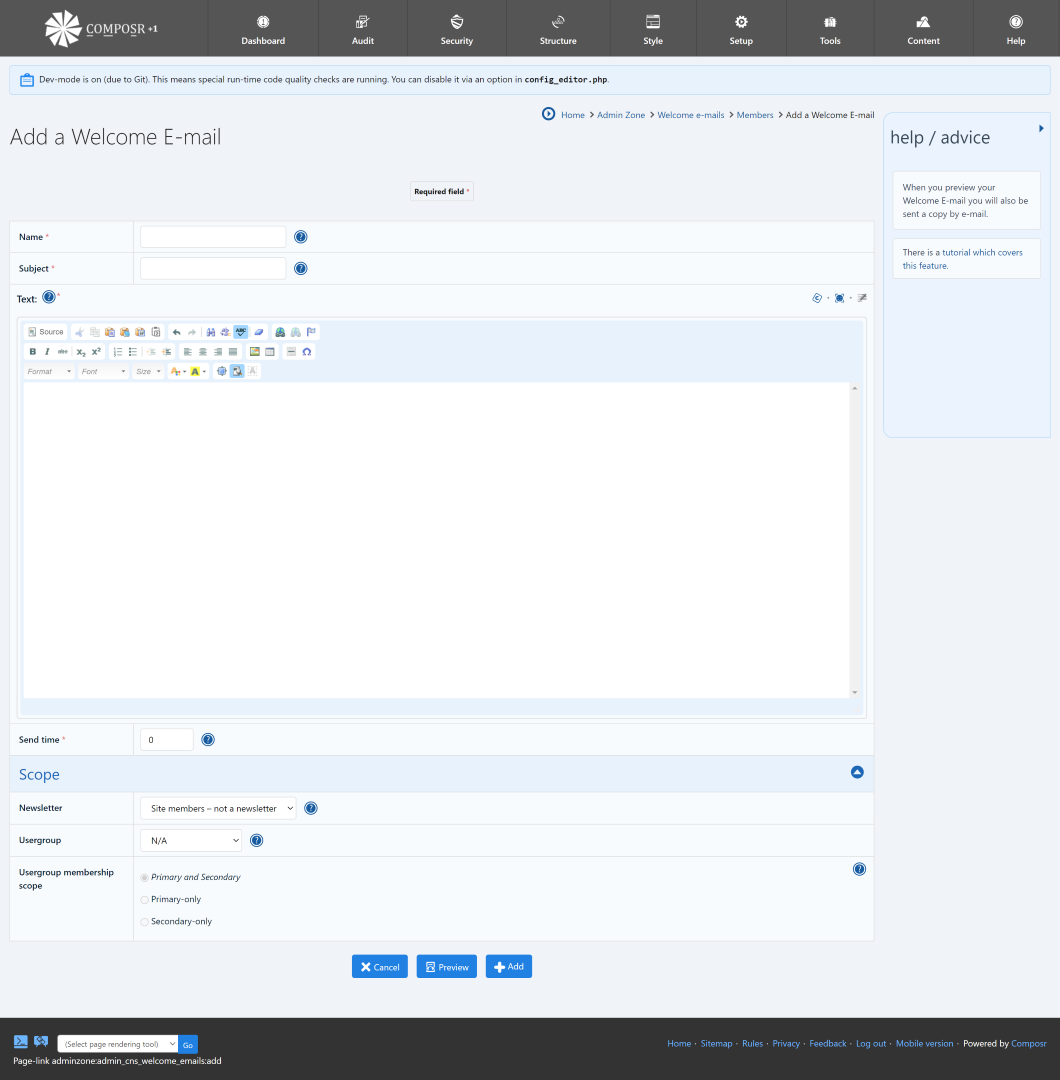
(Click to enlarge)
Set these up at:
Admin Zone > Tools > Welcome E-mails
You can delete a Welcome E-mail from the bottom of its edit form.
The purpose of this feature is to gradually advertise the features of your website to your members in a way that reinforces awareness. As most members will not usually return to a website, welcome e-mails provide a strong tool to keep them aware and entice them to fully embrace whatever service you are providing.
For welcome e-mails to work the system scheduler must be configured as discussed in the Configuration tutorial
Welcome e-mails will only be sent to validated members who have confirmed their e-mail address. E-mails are sent out based on join time, so if a member is not fully validated in time a welcome e-mail may simply never happen.
The one exception is welcome e-mails set to send immediately (i.e. as zero hours). In such a case Composr will assume that validation may not have had time to happen yet, so it will ignore it.
If you know validation may take a while, make sure any non-immediate welcome e-mail is going to happen after you can assume validation will have been handled.
E-mails sent when members are added manually
A very similar feature to welcome e-mails is the ability to send an e-mail when you manually add a new member. There are fields on the "Add member account" form to accommodate this.The only differences between this and having a welcome e-mail set to send at zero hours, are:
- It is only sent to manually added members
- It does not require the system scheduler to be configured
- It sends immediately (not after a few minutes when the scheduler kicks in and anything ahead in the e-mail queue catches clears)
- You can reference the user's new password (explained in the section below)
Referencing member-specific data
As long as you have the newsletters addon installed, welcome e-mails will piggy-back off the newsletters templating code (regardless of whether the welcome e-mail is being sent to members or to a newsletter). This functionality is as described in the Newsletters tutorial ("Templated newsletters"); essentially it means you can use things like {name} in there.For the e-mail sent from the "Add member account" form, an additional {password} reference is supported. This references the password entered on the form. It is not available in welcome e-mails because it is saved into the database in a hash-format which cannot be converted back to the original password: an important and standard security practice.
Importing/exporting members
Importing members from a CSV spreadsheet file
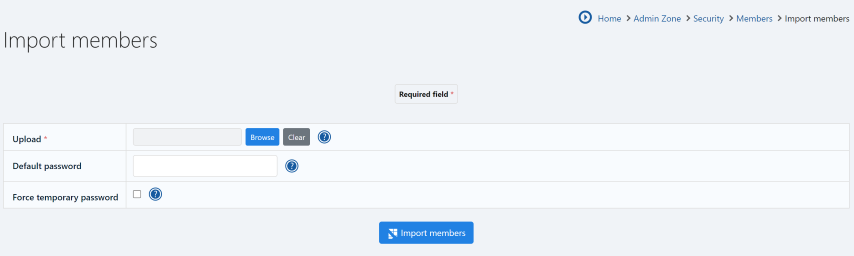
(Click to enlarge)
Exporting
This is very easy. Just go to…Admin Zone > Security > Members > Download member spreadsheet
There are a number of advanced filtering options you can use.
Loading into spreadsheet software
Composr will correctly include all data in a robust way, however spreadsheet packages may default some imported cells as numeric, which will not have any representation for leading zeros.Fortunately this can be worked around.
For Excel (tested on Excel 2011 for Mac)…
- Start a new workbook (i.e. a new file)
- From the "File" menu, choose "Import".
- Choose "CSV File", click "Import".
- Select the file from your computer, click "Get Data".
- You will then be presented with the Text Import Wizard. Leave all settings on Step 1 alone, click "Next".
- On Step 2 choose only the "Comma" delimiter, and leave the other settings alone, click "Next".
- On Step 3, select all cells by holding shift and clicking the far-most right one (so they all go black); then select "Text" as the "Column data format"; then click "Finish".
- On the "Import Data" dialog that comes up just click "OK".
- (Your data should now be imported properly)
For OpenOffice…
Load as normal, but check the "Quoted field as text" checkbox.
Additionally, Excel has a 32KB limit on fields, so may truncate fields, possibly with some kind of error message (such as saying a repair is needed). Avoid embedding raw image data directly into CPFs: use proper attachments or image URLs.
Importing
Follow this process to do an import:- To know the format to import with, it's best to do an export first to get a conclusive input template. So, export your existing members (Admin Zone > Security > Members > Download member spreadsheet)
- Open the spreadsheet in some spreadsheet software (something like Microsoft Excel or LibreOffice)
- Blank out the existing rows in the spreadsheet (except the header row of course)
- Fill in new rows, as required
- Save back to a .csv file
- Take a full database backup (you can never be too careful, a small typo such as a corruption of the header row, or a regular error in the new user rows, could result in proliferate errors after import)
- Import (Admin Zone > Security > Members > Import member spreadsheet). You'll be asked to upload the CSV spreadsheet file and optionally to give a default password. Click the button to run the import.
Further notes follow…
There is full support for auto-creation of usergroups and Custom Profile Fields as required to get the data imported.
i.e. Any column that does not correspond to an existing field will result in a new field being auto-created. Any referenced usergroup that does not correspond to an existing usergroup will result in the usergroup being auto-created.
The importer will tell you when it does this.
Note that Composr will make reasonable/consistent choices if columns are missing or cells are left blank. A missing column implies the default value of a field will be used. A blank field implies blank (or the closest equivalent for that field type) should be used.
Usergroups are referred to by name. You can put multiple usergroups in the usergroup column, separated by "/" (no spaces around this). The first usergroup provided is considered the primary usergroup. For example "A/B" puts someone in the usergroups named "A" and "B".
Passwords may be given in raw text, for the specific new password. If there is " / " in there, it is used to encode the hashed version of the password. This may confuse you a bit when looking at exported data, but don't worry, normal passwords written in there will transfer over correctly (you're not allowed to use a " / " in a password though, due to the previous encoding scheme). If no password is given, the default will be used (which you pick just before you start the import) – if no default was given, blank will be used, so be careful.
Boolean fields (true/false) are assumed false unless one of the following case-insensitive values is given: YES, 1, Y, ON.
If you're importing huge quantities of data
The import process disables normal PHP memory and time limits, however some webhosts may put in restrictions regardless. If you come against problems you may need to limit import batches to a few thousand records per attempt, or temporarily copy your site to a more reliable host (such as your own development machine), then copy the database back across to the live host.
Note that these instructions are based on using an export as a template. We do try and support de facto standards for laying out basic fields such as Username and Password fields (with a variation of different spellings/abbreviation/synonyms/data-formats), but the template method is the best way because it is more predictable for you.
Edits
If a row in the spreadsheet represents an existing member rather than a new member, then we have to handle this as an edit rather than as an add.All default parts of the Composr member record will be replaced. If certain Composr member record fields are not supplied, those will go to the Composr default.
Password is the one exception. If no new password, or hash, is supplied, then the old password remains. That's treated separately as the raw passwords are not saved within Composr, and hashes may not be understood or confidential, so to support reimporting exported records cleanly without the old passwords getting lost we need to be able to skip changing them.
Custom Profile Fields get individually saved, so any missing Custom Profile Field in the import will not result in that field getting reset to the default.
Implicit usergroups and external usergroup listings (advanced)
Composr has support for 'implicit usergroups' which are usergroup memberships defined by custom code written by programmers, and getting usergroup membership from LDAP. It is useful for using permissions for handling special circumstances. For example, a programmer could create an implicit usergroup for under 18's and remove the bypass-wordfilter permission for that usergroup.Limitations and background sync
Usually when Composr handles checks of when someone is in a usergroup it goes through some fool-proof methods to do it by looking at just that particular user. Sometimes Composr needs to efficiently find all members in a usergroup, and bypasses checking implicit groups and LDAP for performance/simplicity.To mitigate this, Composr has a system scheduler hook that is disabled by default to synchronise implicit usergroups as normal usergroup memberships. To turn that on, go to the Admin Zone > Audit > Low-level logging > System scheduler hooks and then enable the Sync implicit usergroups hook.
If this is enabled then anyone put into the usergroup manually that does not match the implicit usergroup check would end up being removed again.
If synching is not enabled, or group memberships come from LDAP, then the following things will not work as expected when it comes to them:
- member search by usergroup
- birthdays RSS feed filtering by usergroup
- sending a newsletter to a usergroup
- implicit memberships are not shown in exported spreadsheet files
- copying members from one usergroup to another
- various areas of code that list all staff
- signing up everyone in a usergroup for calendar event reminders
- showing how many members there are in a usergroup
- listing usergroup memberships when viewing a usergroup
Forced password resets
You can force a member to change their password upon next login (e.g. if you want to promote increased security for some reason), via this Commandr command:Code
echo bcrypt_temporary > /database/f_members/401/m_password_compat_scheme
You can also run SQL queries. To force all members to change their passwords (useful, for example, in the event you are made aware of a data breach):
Code (SQL)
Password strength
There exists a setting for specifying the minimum allowed strength of new member passwords (Admin Zone > Setup > Configuration > Security options > Usernames and passwords). The option allows you to specify a minimum strength from 1 to 10 with 1 accepting all passwords, 5 being considered the standard, and 10 for sites dealing with very high-risk business or information. You should be reasonable about this option; higher values mean more secure member accounts but also more inconvenience when members are trying to choose a password.The way password strengths are calculated is a bit complex. The following conditions factor positively towards a password's strength score:
- Use of upper case letters
- Use of lower case letters
- Use of numbers
- Use of other special characters
The following will negatively impact the strength score of a password:
- Using the same characters repeatedly
- Using your username, e-mail address, date of birth, or a dictionary word in the password
- Using shorter passwords
Here are some general guidelines regarding some of the strength options:
- The 1 (Accept all) option will accept any and all passwords, including dictionary words, usernames, e-mails, and dates of birth.
- Any option 2 or above will not allow the use of a dictionary word, username, e-mail address, or date of birth, unless accompanied by additional characters.
- The 5 (Standard) option roughly equates to an 8-character password that uses at least one upper case letter, lower case letter, number, and symbol, and has no repeating characters. When any of those conditions are not met, the password length must be longer to reach a score of 5.
- The 10 (Ultra-secure) option roughly equates to a 16-character password that uses at least one upper case letter, lower case letter, number, and symbol, and has no repeating characters. When any of those conditions are not met, the password length must be longer to reach a score of 10.
See also
Feedback
Have a suggestion? Report an issue on the tracker.