Composr Tutorial: Feedback and user interaction
Most major content in Composr can be:
- Commented upon
- Rated
- Given track-backs (this is defined and discussed in the Advanced news tutorial)
These features are known together as the Composr 'feedback system'.
This tutorial covers:
- The feedback system
- Contact systems
- Polls
Feedback systems
Enabling
We recognise that many websites owners will not wish to allow users to affect the state of their website: because of this, commenting and rating may be enabled/disabled on a site-wide basis. They are, however, enabled by default. To disable the elements of the feedback, check-boxes are given in Admin Zone > Setup > Configuration > User interaction.In addition to site-wide control of feedback, feedback may also be enabled/disabled on a content entry level. For a piece of content to support rating, for example, that content must be configured for rating, and Composr must have rating enabled site-wide. Composr is quite smart: if most of the content entries for a content type don't have ratings/comments enabled then the default for new entries will match that.
Rating
This content page demonstrates rating and comments
(Click to enlarge)
There is a main_rating block that you may use to allow any Comcode page to be rated (by placing the block on the page). In fact, we use this on the tutorial pages.
Trackbacks
Trackbacks are described in the Advanced news tutorial.Comments
Feedback commenting is very similar to, and actually implemented as, a forum topic being attached to a piece of content, and displayed beneath it. To allow users to comment on Composr content, in addition to site-wide commenting any commenting for the content entry being enabled, the named comment forum must exist; the default comment forum name is 'Website comment topics', but this is configurable in Admin Zone > Setup > Configuration > User interaction.Note that any commenting scenario requires a forum installed. Using the 'No forums or members' forum driver (chosen at installation), or using the in-built forum but with the cns_forum addon not installed, will not work.
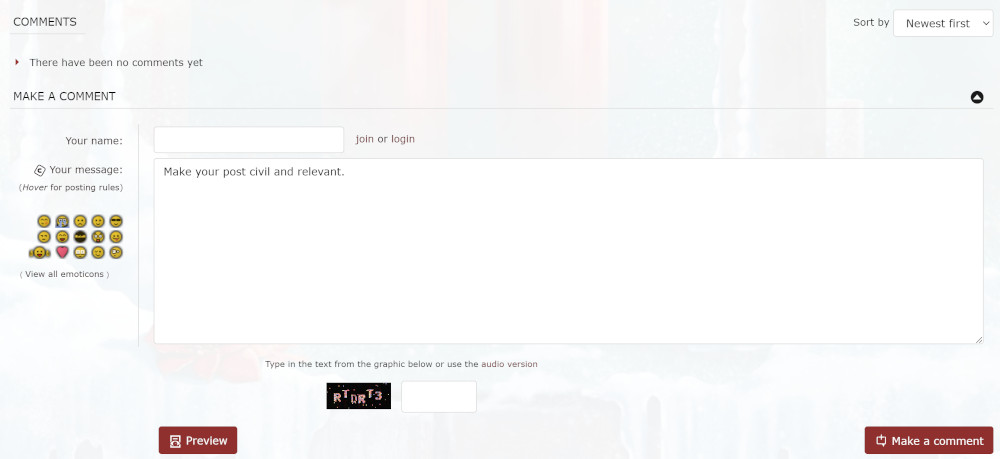
The comments block
There is a Composr block named main_comments that allows any Comcode page to become a page with its own comments. This is a very useful feature, usable for purposes such as:- a guest-book
- documentation where users may make comments, adding to it, or directing staff to make improvements
Placing comment topics (advanced)
By default, all comment topics all placed in the configured website comment topics forum.However, you can use the Commandr set_comment_forum command to set it so resources under specific content-types and categories have their comments into forums of your choice.
The contact blocks
Contact block
The main_contact_us block
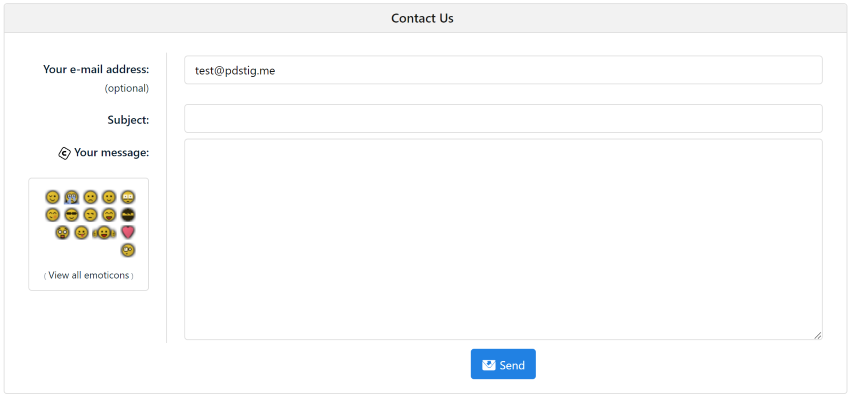
(Click to enlarge)
Catalogues contact form (as e-mail)
Adding a contact catalogue
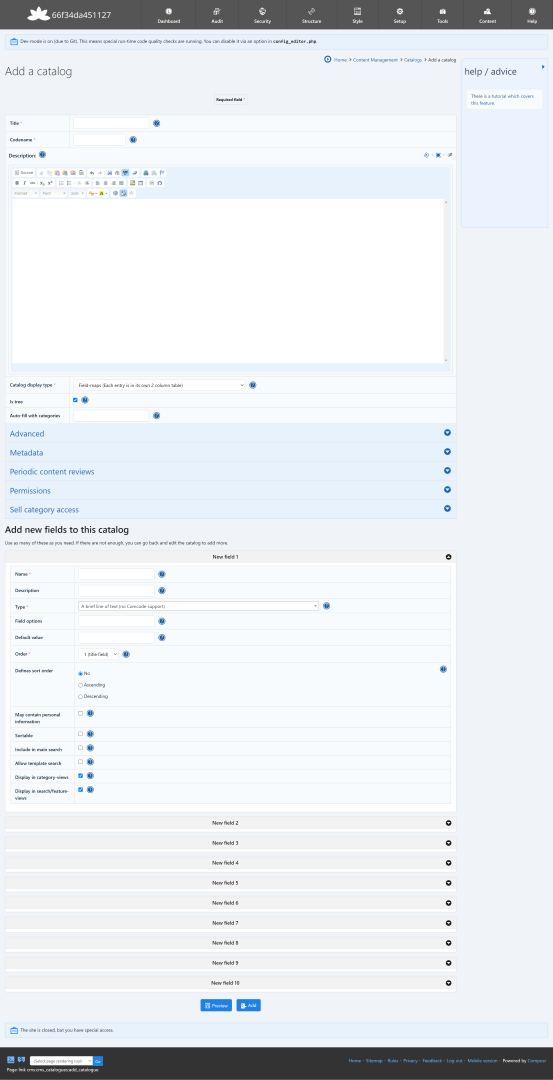
(Click to enlarge)
Choosing the main_contact_catalogues block from the block construction assistant
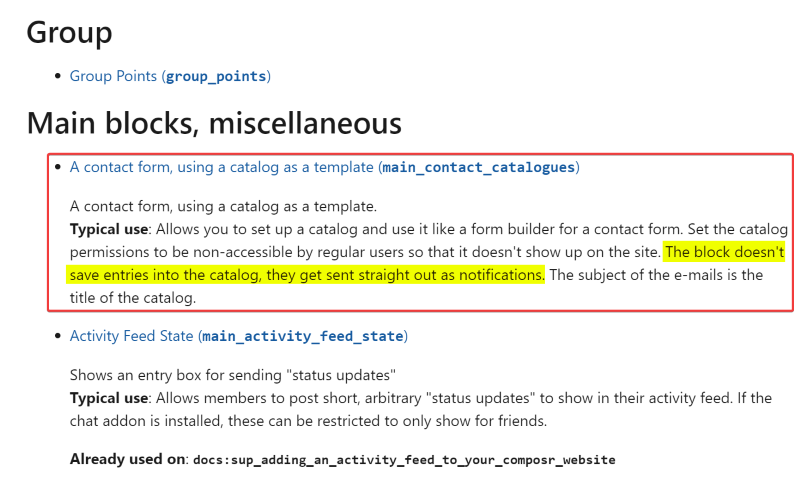
(Click to enlarge)
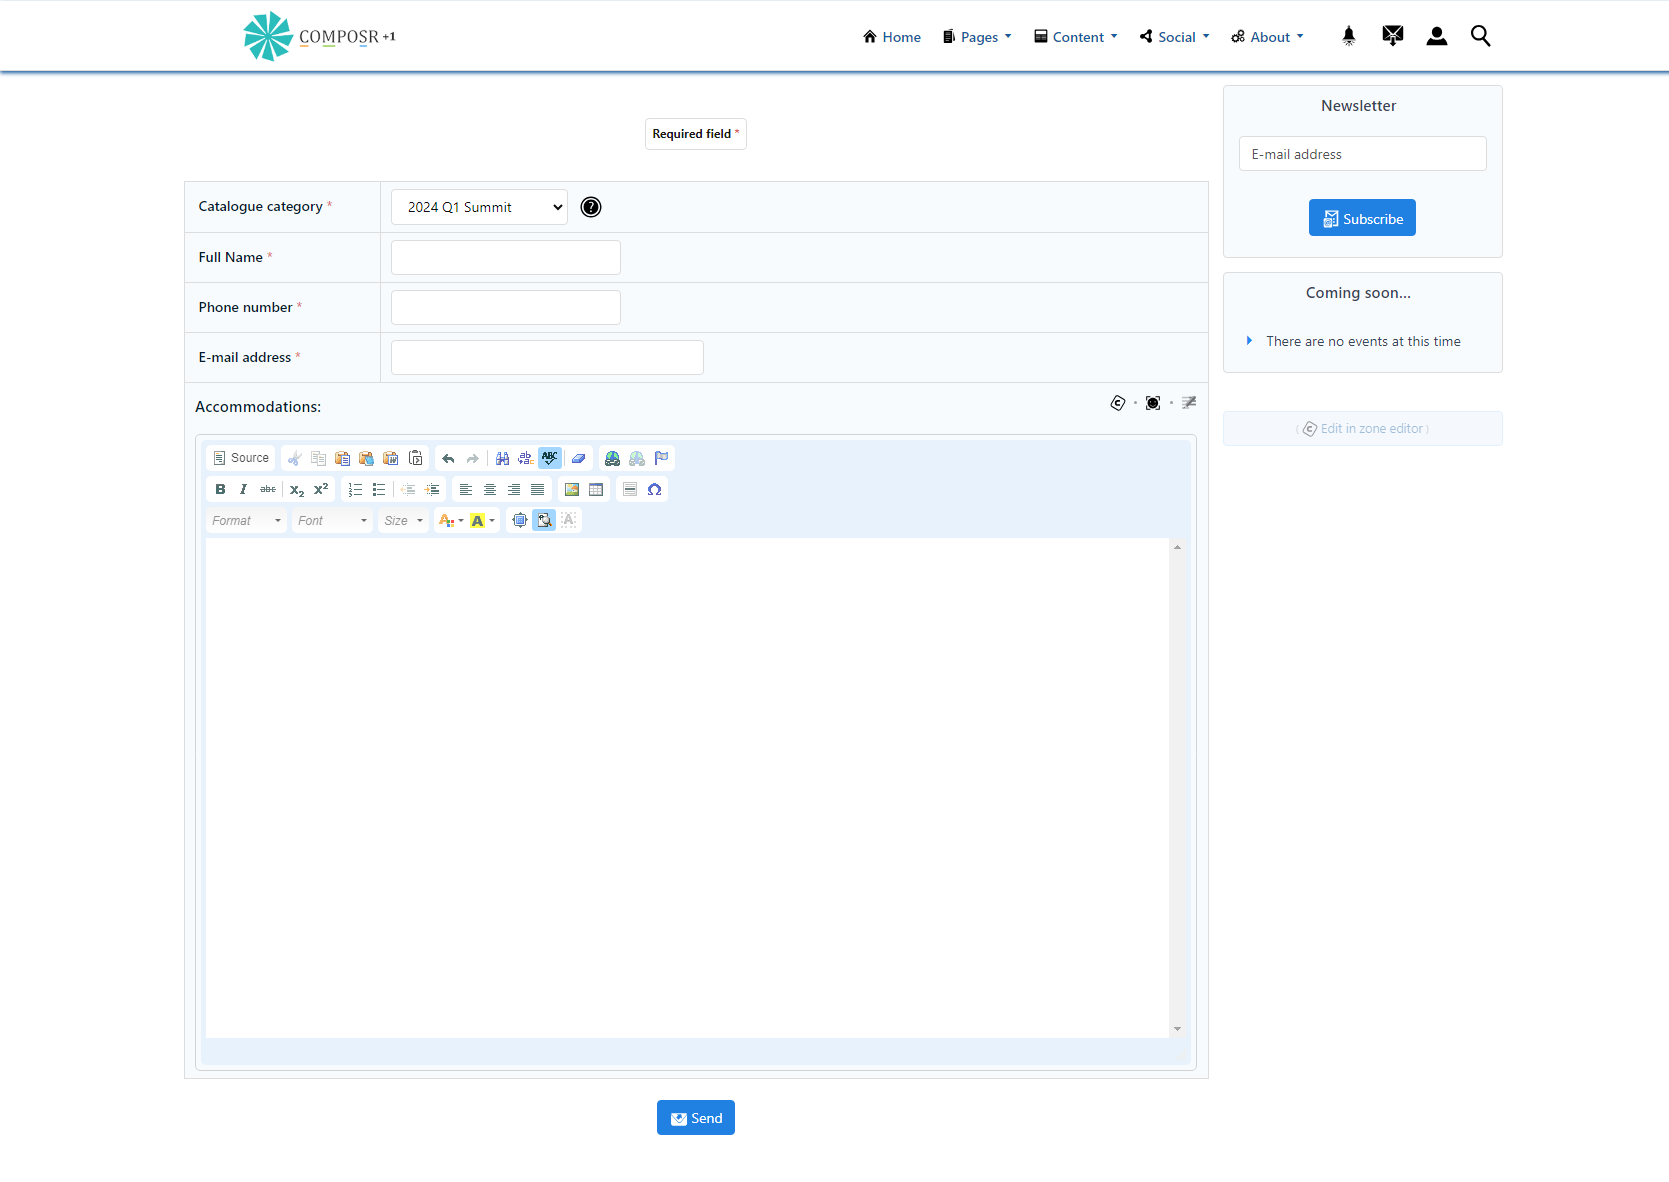
The main_contact_catalogues block form
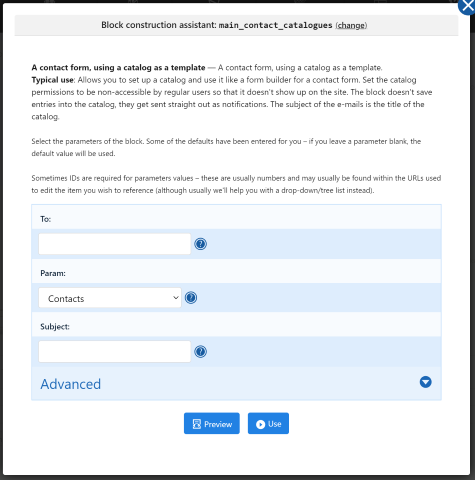
(Click to enlarge)
Viewing the main_contact_catalogues block
(Click to enlarge)
The process for using this block is as follows:
- Add a new catalogue, via Admin Zone > Content > Catalogues > Add catalogue. Include whatever fields on the catalogue that you want on the contact form. You'll probably also want to disable View access on all the usergroups.
- (Don't add any entries or categories to the catalogue, that wouldn't serve any purpose)
- Go to add/edit the page where the block should go.
- Add the block to it in the normal way. When adding the block you are asked which catalogue to use.
You can set field options to tag fields used for the contact message:
- tag=email – to set the 'from e-mail'. You can also pre-populate an "An e-mail address" field with the current member's e-mail address via a default value of !.
- tag=name – to set the 'from name'. You can also pre-populate an "A brief line of text" field with the current member's display name via a default value of NAME.
- tag=subject – to set the 'subject'.
Catalogues form (as entries)
Adding a catalogue form
(Click to enlarge)
Choosing the main_catalogues_form block from the block construction assistant
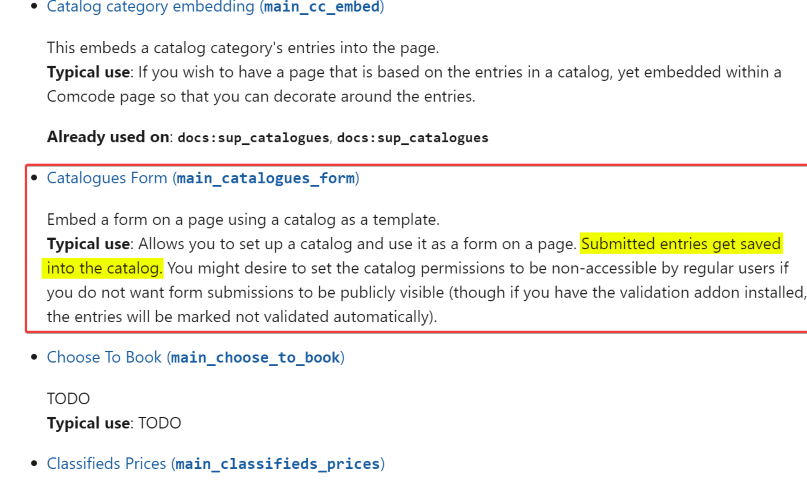
(Click to enlarge)
The main_catalogues_form block form
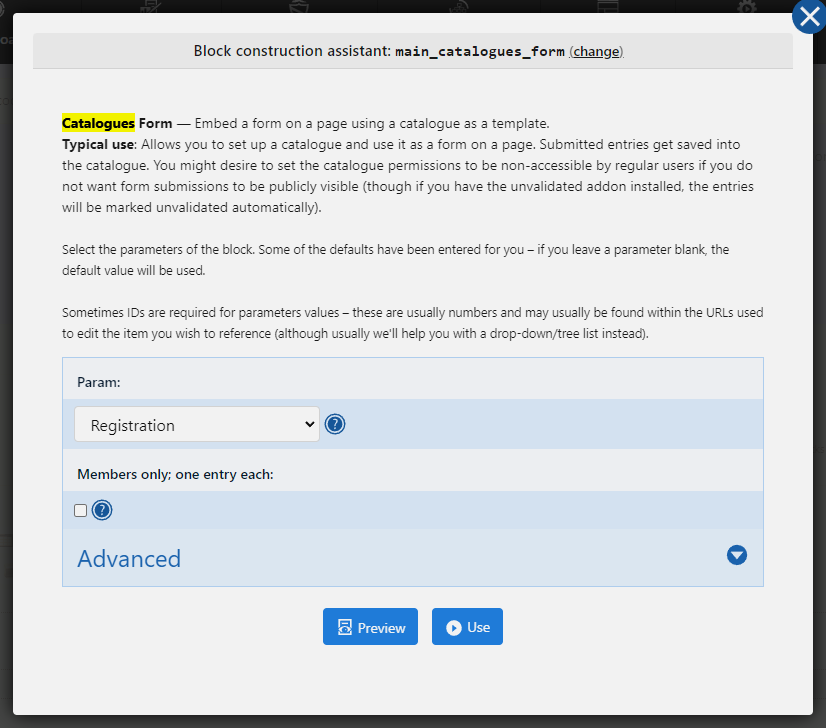
(Click to enlarge)
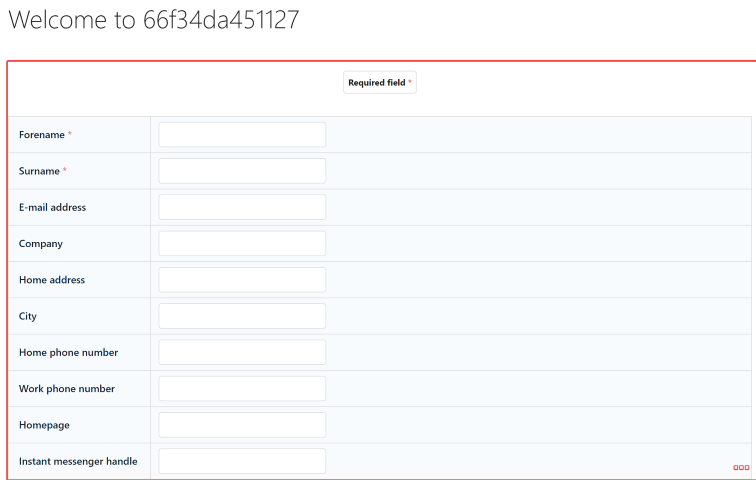
Viewing the main_catalogues_form block
(Click to enlarge)
The process for using this block is as follows:
- Add a new catalogue, via Admin Zone > Content > Catalogues > Add catalogue. Include whatever fields on the catalogue that you want on the form. You'll probably also want to disable View access on all the usergroups if you do not want members seeing submitted entries.
- Optionally add categories to the catalogue; the generated form by the block will prompt the member to select a category if more than one exists.
- Go to add/edit the page where the block should go.
- Add the block to it in the normal way. When adding the block, you are asked which catalogue to use and whether members may only submit one entry per member (which also prevents guests from submitting).
Simple e-mail form
There is also the main_contact_simple block.This block relays direct to e-mail, avoiding any dealing with notifications and message management.
Any POST fields that Composr does not consider a "control field" will be included within the e-mail.
This block looks very similar to the main_contact_us block.
Be careful with using this block as there exists the potential for spam / abuse. Composr cannot sufficiently run all its checks to prevent spam given how this block works and relays fields.
Custom commenting forms (advanced)
You can use the data/form_to_email.php script to relay custom POST data sent to it, to the staff e-mail address.The clear advantages of this over the Composr contact blocks are:
- If you don't want to wrestle with the default Composr template's HTML/CSS (COMMENTS_POSTING_FORM.tpl)
- If you want to set up multiple contact forms with very different HTML/CSS and are not comfortable using advanced Tempcode to make COMMENTS_POSTING_FORM.tpl contextual
- If you already have some HTML/CSS to use and just want to keep things very straight-forward, not having to think too much about integration and 'jumping through Composr hoops'
The following special POST fields are supported:
- subject: Subject line (default is site name)
- email: E-mail address of sender (default is the e-mail address of the current user or staff address if there is none)
- name: Name of sender (default is the username of the current user)
- to_members_email: Member to e-mail. This is not available by default. See the Code Book for the allow_member_mail_relay option if you need the form to work for e-mailing regular members.
- form_name: Form name (if you want to name the form for the stats addon to show data against).
- redirect: URL to redirect to after the relay is done (if non-set then it will show a success message)
Any other fields (except certain special reserved names) you pass will become part of the post body. Pass label_for__<field_name> to label the fields for a neater e-mail (optional).
You can of course have hidden fields (type="hidden" in HTML), to pass special values through automatically. This is useful for customised tracking.
Here is an example blob of HTML+Tempcode to demonstrate the functionality:
Code (HTML)
<form action="{$BASE_URL*}/data/form_to_email.php" method="post" onsubmit="return $cms.form.checkForm(this,false);">
<p>
<label for="subject">Subject:</label>
<input class="input-required" type="text" name="subject" value="" />
</p>
<p>
<label for="name">Your Name:</label>
<input type="text" name="name" value="" />
</p>
<p>
<label for="age">Your Age:</label>
<input type="text" name="age" value="" />
<input type="hidden" name="label_for__age" value="Your Age" />
</p>
<p>
<label for="location">Your Location:</label>
<input type="text" name="location" value="" />
<input type="hidden" name="label_for__location" value="Your Location" />
</p>
<p>
<label for="email">Your e-mail address:</label>
<input type="text" name="email" value="" />
</p>
<input type="hidden" name="redirect" value="{$PROTECT_URL_PARAMETER*,{$PAGE_LINK,:thanks}}" />
<button type="submit">Send message</button>
{$INSERT_FORM_POST_SECURITY}
</form>
In this example the subject field has been made required.
If you want to use this outside Composr:
The required field validation wouldn't work as this is controlled via the Composr JavaScript framework. You'd need to either implement $cms.form.checkForm yourself, or remove/change the onsubmit attribute.
If you want this within a Comcode page:
It also is likely a good idea to change {\$BASE_URL*}/data/form_to_email.php to {\$FORM_TO_EMAIL_URL,_some_page_name}, where _some_page_name is your "message sent, thank you" page. The symbol automatically inserts a redirect parameter and propagates any keep_* URL parameters, without you having to embed too much complex Tempcode which you'd then risk having mangled by content editors. If you just use {\$FORM_TO_EMAIL_URL} then it will redirect back to the page your form is on.
The example will produce an e-mail like:
with the e-mail Subject and From lines set appropriately.Your Age: the age input
Your Location: the location input
Anti-spam security
We don't use CAPTCHA here to keep things simple. But you can see we did include the spammer blackhole (enabled by default, "Blackhole detection" configuration option), which will typically trick bots into getting themselves blocked.CAPTCHA can be supported. To do so you have to:
- pass a hidden _security field with value 1
- copy and paste the CAPTCHA code from COMMENTS_POSTING_FORM.tpl
- ideally, configure your web server to block requests to the data/form_to_email.php script if _security is not set. Otherwise CAPTCHA won't be enforced and someone could (if they had the will…) write a smart bot that strips the _security field from the requests.
Polls
Initially there is no poll, so the poll block displays like this
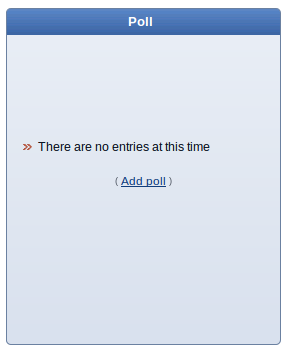
(Click to enlarge)
Adding a poll
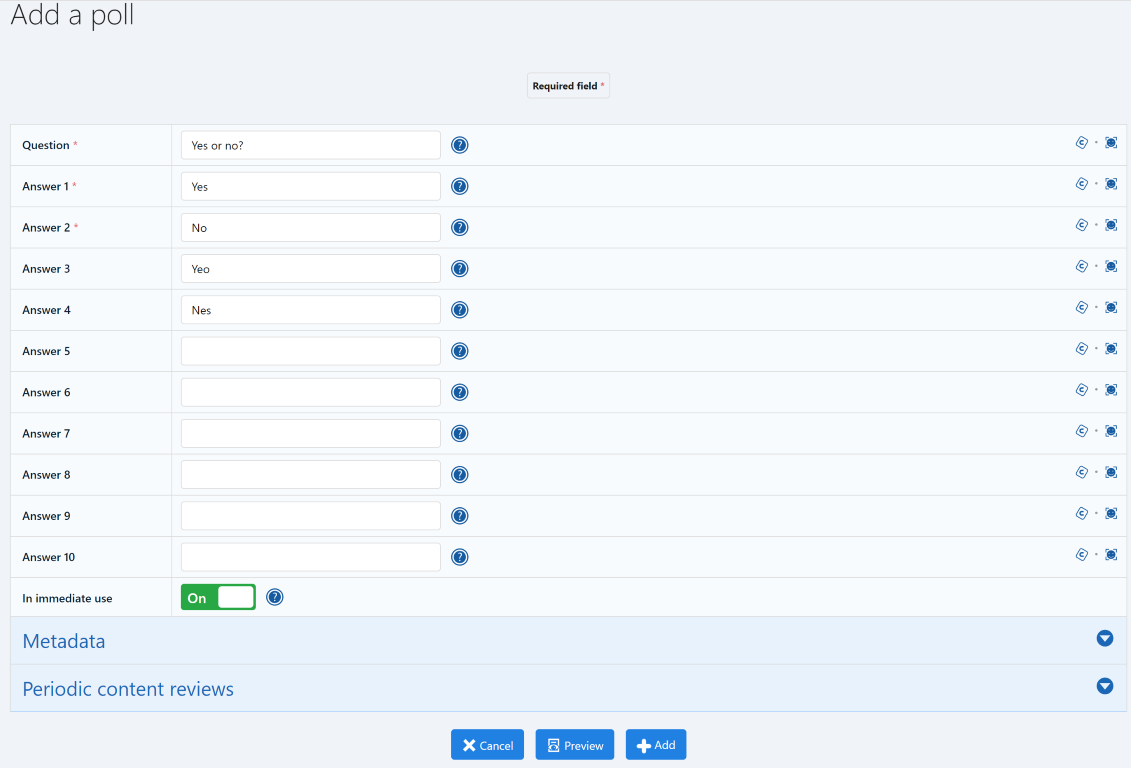
(Click to enlarge)
The poll block, once a poll is chosen
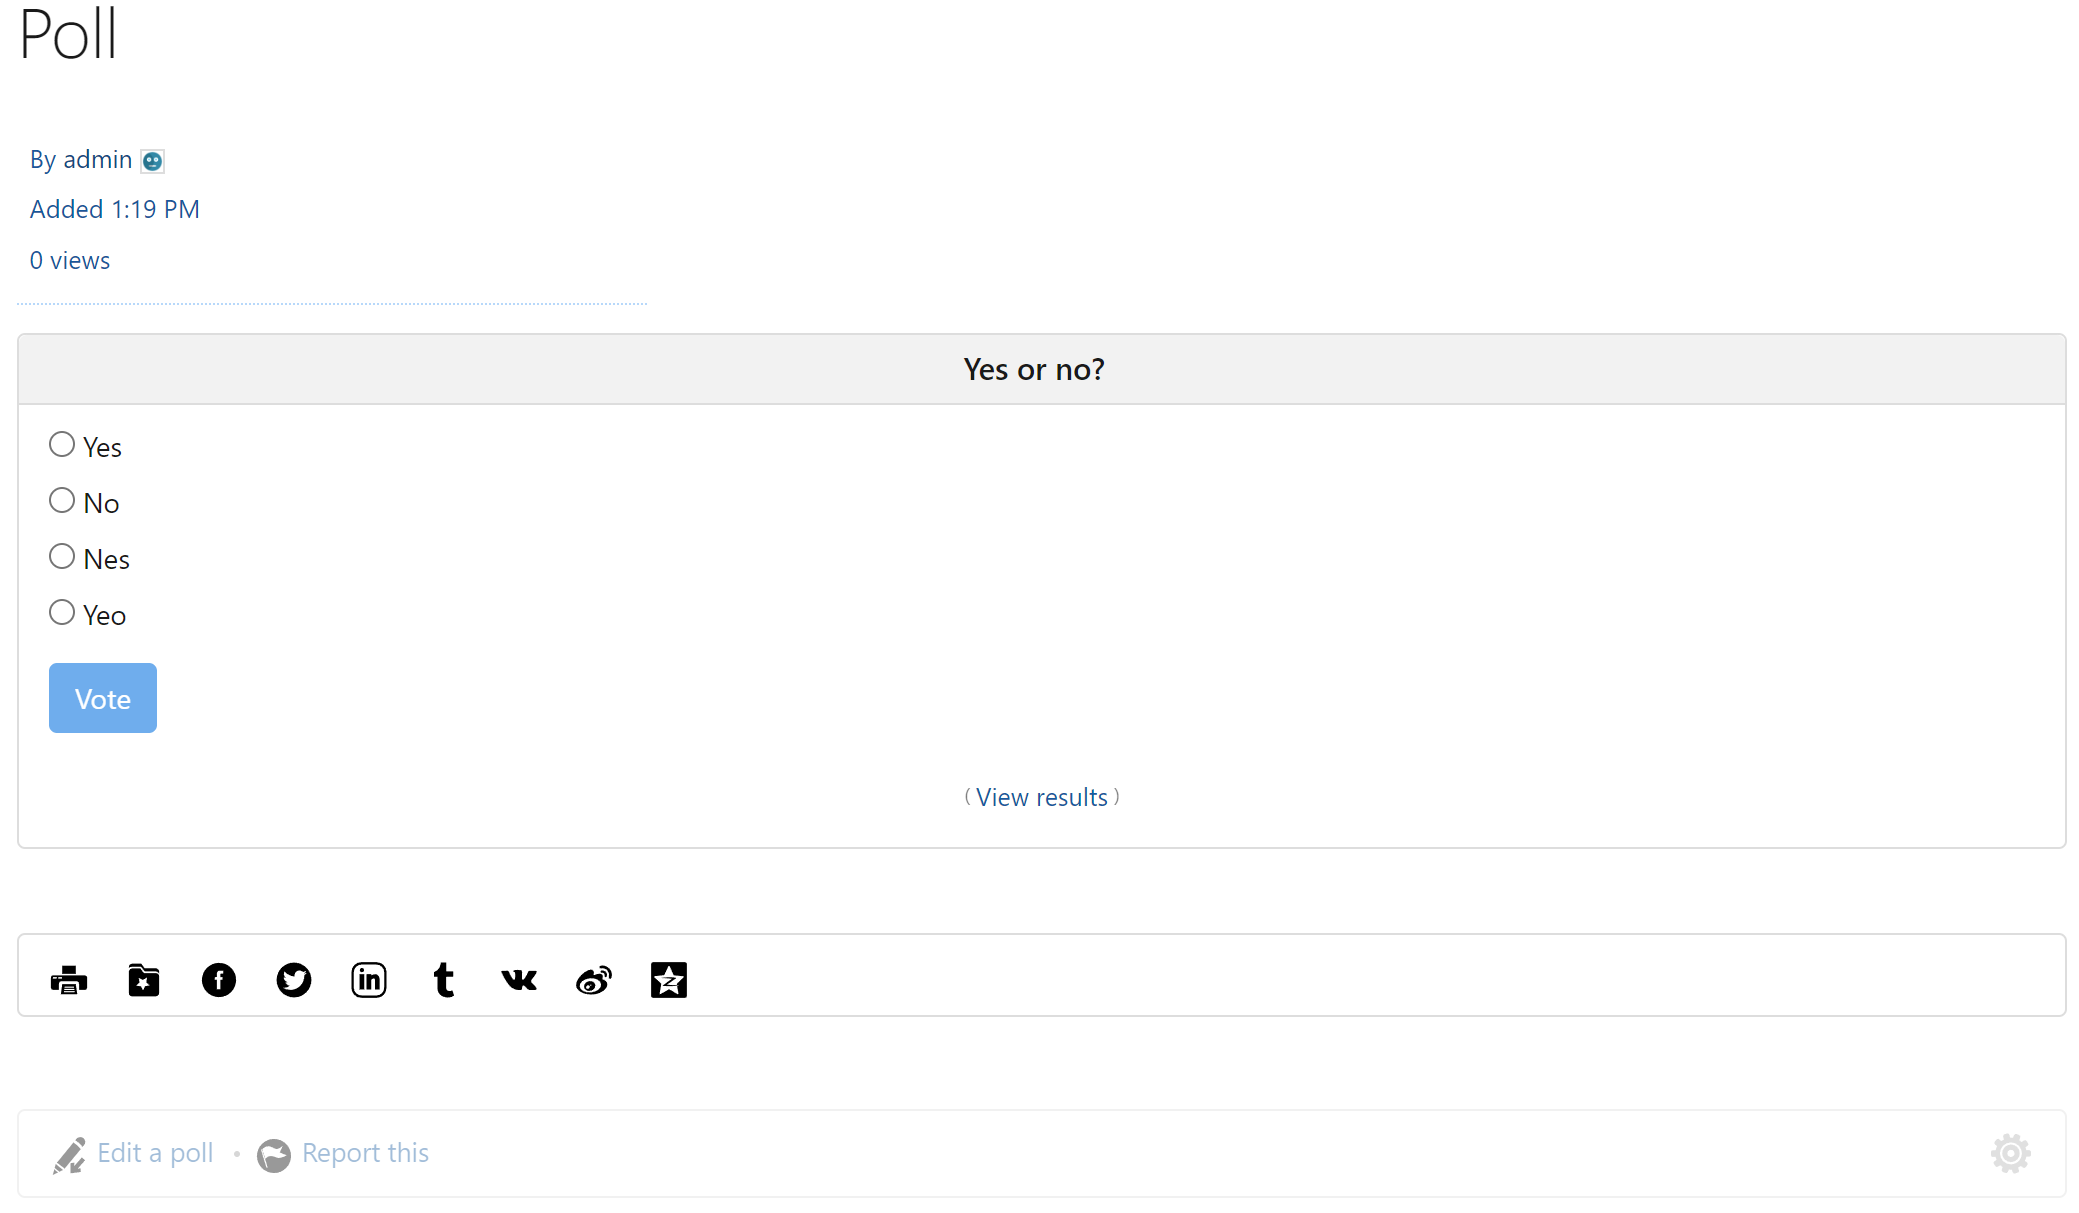
(Click to enlarge)
- to charge the atmosphere of an interactive website
- to increase the feeling that the website is regularly updated, by changing polls
- to gather feedback from those who are not likely to go to the efforts to write it down
- to generally find answers to questions that may not be very important, but difficult to find the answer to without a poll
Polls are managed from Admin Zone > Content > Polls.
You can delete a poll from the bottom of its edit form.
By default, the poll block is displayed on the front page (unless this was changed in the Setup Wizard), and set up to display whatever poll is currently selected from those that were added. On a fresh install, there is of course no poll yet, so a message about this is shown. When you add or edit a poll, you have the choice to select it as the current poll: the selection date is stored, and this allows Composr to display an archive of past polls.
Past polls can be found from the polls module (site:polls page-link, Social > Polls on the default menus).
Members can only vote once in a poll. Guests may only vote once. IP addresses as well as member IDs are used to see who has previously voted. If a user chooses to view poll results before voting, they forfeit their vote. Once Composr has decided a user cannot vote (again), that user will always/only see the results whenever they see that poll.
If you can't vote remember:
- You can only vote once.
- Double-vote prevention is IP-tied as well as member-tied. If you test across multiple accounts it will count together.
- Clicking "view results" acts as a forfeit, counts as a vote.
Any numbers of different polls may be shown on your website if you choose to select them using poll ID number as a block parameter, rather than relying on the standard selection mechanism (click the "Add Block" button when editing a Comcode page if you'd like help placing main_poll blocks).
Polls are limited to 10 answers. If you need a more complicated polling mechanism, consider a survey.
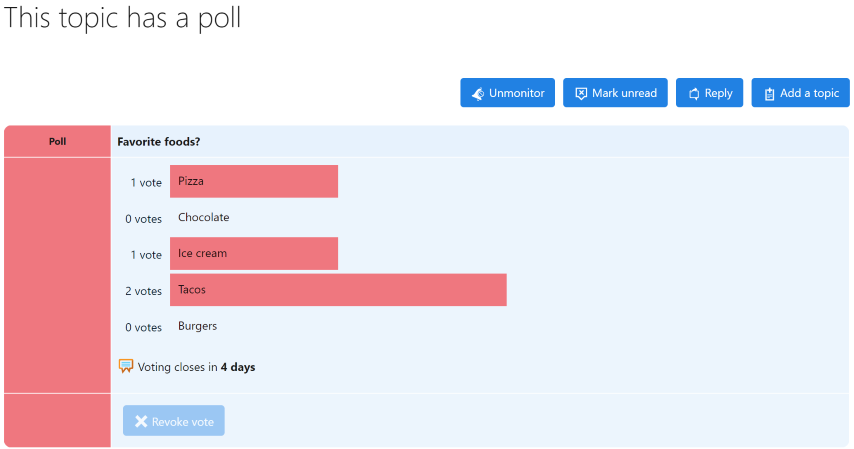
Topic Polls (Conversr)
The results of a topic poll
(Click to enlarge)
A topic poll on which the member can vote
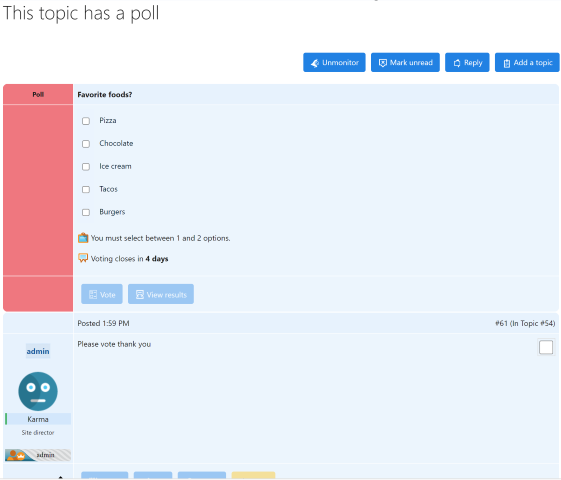
(Click to enlarge)
Some of the features topic polls include that website polls do not are the following:
- Set a date and time voting closes
- Require making a post (reply) in the topic to vote in the poll (great if you want members to provide explanations for their vote)
- Control when (or if) poll results are publicly visible
- Control if, providing poll results are publicly visible, the public can also see which members voted for each option
- Control whether members may revoke / change their vote when voting is still open
- Control if votes are weighted by the number of rank points members had at the time of voting (see Discussion forums > Weighting poll results with points). This is great to give more voting power to more vetted members.
- Make more than 10 options
- Allow members to vote on more than one option, and control the minimum and maximum number of options on which a member may vote
- Set XML on a per-forum basis to force certain settings on all topic polls within that forum (see Advanced forum settings > Default Poll Options). This is a very powerful feature and even allows you to control the allowed options (e.g. you could force "Support" or "Oppose" options in a pro/con debate forum).
See Discussion forums for more information on topic polls.
Staff notes
Content usually has a "Staff notes" field, which can be used to put notes intended only for people to see upon-edit. This can be enabled/disabled via the "Enable staff notes" configuration option.Concepts
- Feedback
- The common title given to Composr systems for feedback that are available across different forms of content
- Poll (website)
- A poll which is visible on the main site; these polls could be submitted by members but are mostly facilitated by staff
- Topic poll (Conversr)
- A poll which resides within a topic in the Conversr forum system; these polls are mostly facilitated by the topic author
See also
- https://www.futurelab.…012/05/1990-rule-outdated
- Running a virtual support desk
- Nuances of forum integration
- Advanced news
- Using blocks
- Quizzes
- Discussion forums
- Advanced forum settings
Feedback
Have a suggestion? Report an issue on the tracker.